Trade Show TalesBlog

Archive for January, 2020

I Like Big Graphics and I Can Not Lie / Baby Got Big

January 31st, 2020 1 COMMENT

How to Design Large Format Trade Show Graphics

Jacob Norris, Guest Post

“Oh my god Becky, look at that large trade show graphic!”

Forgive the Sir Mix-a-Lot reference. I couldn’t resist. But then again, most graphic designers have a good sense of humor, both artistic as well as musical. A good song can inspire and change your design mood, just as seeing work from other designers can give you great ideas.

What we are going to review today is the terribly easy world of large format graphic design for trade show exhibits and other large structures. Now of course, as a graphic designer, you noticed I put the words “terribly easy” into that previous sentence and you instantly think I’m crazy. Most designers rarely design a layout larger than a corporate booklet or perhaps a 20″ x 30″ poster. Therefore, when it comes to knowing the secrets to making a perfect graphic print at 30 ft. wide by 10 ft. tall, designers get cold sweats and think of calling in sick that day.

But fear not. Designing for large format is actually quite simple once you know the basic steps. And, if you do large format designs on a regular basis, you might find that it is more enjoyable than most jobs. All it takes is a leap of faith… and trust in my advice.

Please note this is only a breakdown of the most important elements. Should you need more details, I’m happy to provide further information.

Viewing Graphics from a DistanceTip #1 – Large Format Graphics are Viewed from a Distance

When you look at a billboard along the freeway, you probably wonder how a large graphic can appear so crisp. The beauty of billboard graphics is that, if viewed from 1 ft. away, it would appear like a blotchy and dotted mess. It’s the perceptive ability in our eyes to complete images that makes such items work.

The concept for trade show graphics isn’t that much different. But, luckily, trade show printing is MUCH higher quality than billboards. However, the concept is the same. At a trade show, it is rare for a booth visitor to stand 1 ft. away from a printed graphic that is 30 ft. wide by 10 ft. tall. Though it does happen. A large format trade show graphic must be stunning from the aisle as potential customers pass by. You want to create something unique and eye-catching without worrying about print quality. Should someone stand next to the display, and really want to analyze the quality, they may notice a slight difference from perfect. But that isn’t common.

Tip #2 – Patience and Computer Power

You need to have a powerful computer before you design something in large format. Many of the files you will be processing can be beasts on your RAM and processing speed, not to mention your video card. Therefore, if you feel your system isn’t up to the task, but you have still been given the job of designing something very large, I recommend you be patient. Most modern systems that run graphic design software without crashing on opening will eventually process your requests if you wait. You just have to allow the system to get through all of the math.

One change you should make to your Adobe software (I’m assuming that is what you are using because hardly anyone uses other graphic design software today) is to alter the scratch disc settings. In Illustrator you will find that under “Preferences” then “Plug-ins & Scratch Disks.” When you find it, be sure to change the “Primary” to STARTUP and the “Secondary” to the largest hard drive on your computer. Usually that is the main drive, but if you have larger drives on your system used for storage, change it to that. In Photoshop, you will find these settings under the “Edit” menu followed by “Preferences” and then the “Scratch Disks” section. Here you may only have one option depending on your system. Specify the main drive as primary start-up disk and then, if you have a secondary, larger drive, used for storage, use that as another. This will actually set the drives to use hard drive space for extra processing during your layout.

Power systems today can use up to 32 GB of RAM and have processing speeds that are out of this world. 64 bit systems are always desired but not always affordable. The more RAM and processing power you have, and the faster video card you have with as much internal RAM as possible, the smoother your experience will be.

But, for many years I have worked on systems well below the standard recommended system for large format design and still accomplished my goals. The word is always patience. You need to allow the system to process.

Tip #3 – Resolution is Different in Large Format Design

Most standard corporate designs, such as business cards, brochures, booklets, and magazines, require you to work at 300 ppi (pixels per inch) or higher. However, for large format design, you do not need that level of resolution. Instead, most large format printers work at anywhere from 100 to 120 ppi maximum. The main rule is to always read the company’s graphic submission requirements so you know what resolution they are looking for. If they state that 100 ppi is the requirement, that means your “raster images” should be 100 ppi at final print size or 100% scale. Knowing this resolution requirement ahead of time will save you many hours of waiting for your computer to process and save a file. Imagine creating a display graphic that is 10 ft. wide by 8 ft tall in Illustrator or Photoshop with a resolution of 300 ppi or higher on raster effects and images! The time it would take (if your computer would even manage it) would be large indeed. And the file size would just be too big.

Large format printing is different from standard offset printing. Dye sublimation, UV wide format inkjet/direct print, and Lambda outputs print excellent quality at lower file resolutions. The brochure image you printed at 300 ppi can print the same quality at 100 ppi on fabric using a dye-sublimation press. It just works.

Scaling GraphicsTip #4 – Scaling Items and Viewing at 100% Zoom

At some point in your large format graphic design adventure, you will need to use raster/bitmap photo images in your layouts. Hopefully you have very large, high-resolution images, but how do you really know what will work?

When working with raster images, you should always pre-scale them in Photoshop so you know the “natural size” for all resolutions. For example, if you have a photo that opens in Photoshop and is naturally 11″ wide by 17″ tall at 300 ppi and looks perfect, you should then find out how that image will scale to larger sizes. To do this, go to the “Image” menu in Photoshop when the file is open and select “Image Size.” At that point, look at the dimensions of the file and then “uncheck” the “re-sample” box.

Once that is done, change the width of the image to something higher, like what you actually want it to print at. You will see the resolution drop. Or, alternatively, just change the resolution at that point to the required resolution your printer has asked for. In this case, the 11″ x 17″ image that is 300 ppi, when reduced to 100 ppi, becomes an image that will print to 33″ wide by 51″ tall. Not a bad increase. You can then re-sample the image to larger sizes, but we’ll get into that later.

Getting back to the original 11″ x 17″ image. Before you scale it up, be sure to view the image at 100% zoom on your computer screen (working on desktop systems is recommended as most laptops do not clearly show full quality). Large format printing is exceptionally accurate when it comes to the print quality in real life compared to what you see on your computer screen. Should you see an imperfection on the screen, it will print that way on the final output. It’s always good practice to view all raster images and full layouts at 100% and go through every inch of the design before you send it to a printer. That way, you will know if there is a quality problem.

So that 11″ x 17″ 300 ppi image, when dropped to 100 ppi, will now print at 33″ x 51″. That is an excellent enlargement without altering the file size in any way! But what if you need to make the image larger beyond that?

Tip #5 – How to Force Raster Images to Sizes Larger Than They Support

The latest version of Photoshop has excellent tools for making raster/bitmap images bigger than they naturally are. Older versions of Photoshop can also perform these tasks, but it requires multiple manual steps to accomplish the goal. The latest CC version has most steps built-in to the “Image Size” options.

Forcing Raster Images to Sizes Larger Than They SupportTo make our 11″ x 17″ 300 ppi file that has now become 33″ x 51″ when dropped to 100 ppi even bigger, we must force it up. The steps are simple but still require you to view the file at 100% scale afterwards. Begin by turning on the “re-sample” check box again when viewing the file with the “Image Size” window open. Then, look for the “Preserve Details (enlargement)” or “Bi-cubic Smoother (enlargement)” items in the drop-down menu beside the re-sample check box. Here you can play with the options presented in the enlargement as there are various settings to control. But, the basic idea is to choose one and then force the image up to the final print size.

For our example, let’s say we want to go to 65″ wide. With the re-sample check box active, the image will instantly convert to the correct height when you change the “width” to 65. And the print resolution will be maintained. Give it a try to see what happens. When the file has finally processed, you will see a larger image with some slight loss in quality. But, since we are printing in large format, which is usually viewed from several feet away, you shouldn’t have too much of an issue.

On a side note, it is not recommended you increase images beyond 200% in scale, especially if they are already lower quality images. Since you will be viewing the file at 100% scale on your screen and will know what each inch of the image will print at, the decision is up to you. Many raster images behave differently depending on the original quality of the image. I’ve seen some stock images scale up to 400% larger while others only support around 150 to 200%. It comes down to how the image was originally created.

Photoshop Noise and Manual Touch UpsTip #6 – Photoshop Noise and Manual Touch Ups

Beyond the scaling up of images we just discussed, you may find the need for further touch ups. I’ve found that using the “add noise,” “dust and scratches,” and the “reduce noise” filters after the enlargement can improve your finished image greatly. Experiment with these filters after going through the previous steps with an image of your choice to learn what works best.

Afterwards, I always recommend getting back to the 100% zoom setting and then manually fixing any blotchy areas or imperfections using cloning tools or the content aware fill features in Photoshop.

Tip #7 – Software Choice is Key

Most large format printers will accept files from Photoshop and Illustrator. Some will accept InDesign but more rarely. Very few will accept Corel products or third-party free apps like GIMP. And, I do not know of any respectable large format printers that will accept standard files from MS office software such as Word, PowerPoint, and so on. Therefore, it is important to have the right design software.

My first choice for large format design is always Adobe Illustrator. Although most designers feel more comfortable in Photoshop, Illustrator is really the most powerful tool for final assembly of your large format design.

You will of course use Photoshop for all preparations of raster images before placement into the Illustrator design, which makes Photoshop very important. But as an assembly tool with superior control of color, measurement, tone, and scale, no software compares to Illustrator, especially with the vector capabilities for shapes, illustrations, text, logos, and so on.

Sometimes you may need to only work in Photoshop if the entire job is raster based, and you must work at extreme dimensions and settings. That is OK too. The key is to know the graphic requirements of the printer and adapt accordingly. Which brings us to the next step.

Tip #8 – Read the Graphic Requirements

Each large format job will have a specific list of graphic requirements for how the job should be prepared. Some printers will actually ask you to send “only PDF” files while others want original source files. But the key beyond the file format is the steps you need to take for proper file prep.

  • Should the file be 100% scale (or can it)?
  • Should the file be in RGB or CMYK mode?
  • Will Pantones be an option and, if so, should you use coated or uncoated?

All large format presses are run in CMYK and do not conform to the usual offset printing rules. They can’t put in, say, Pantone 200C ink, and give you a match. Rather, prints are calibrated on a job-by-job basis in CMYK (or, on rare occasions, sometimes RGB) to try to get the color you indicated. Therefore, knowing how a printer wants the job is very important. So read the manual!

Other Tips:

  • Less is more in large format design. Keep your designs simple. Something that is 20 ft wide, if very complex, will seem even more so. Simple images create stunning results.
  • Keep a buffer of white/blank space in the design. Often you will find that display structures in large format have very odd constructions and shapes. Therefore, try not to span too many elements close to edges or over onto other elements of the design that have breaks. Rather, the more you keep “focus” elements of your design on the side/base they are intended, the better visual result you will have for marketing.
  • One item in large format graphic design that makes all designers shudder is file size. If you are trying to create something so very large in the real world, you of course expect your file size on the computer to equal that frightening number. But there are tips to solve this, especially if working in Illustrator. Read this secondary article to learn how to reduce file sizes for large format design:  https://www.fpportable.com/designing-large-format-graphics-in-illustrator.html 
  • Finally, you should never feel embarrassed as a designer to contact another designer for help. If any of the information you read here today, or any information you see on the graphic requirements pages/sheets for your current large format job don’t make sense, be sure to contact the company and ask questions! That is why these people are working in this industry. They WANT to make your graphic the most beautiful output possible. Designers that work in large format really care about results and always want to make the highest quality prints anyone has ever seen. So, if you just are not sure what to do, just contact the company you are working with. All professional large format design teams are eager to assist any level of designer as they enjoy the work and conversation. If you encounter someone who “doesn’t” treat you that way, you are not working with a professional team.


Large format graphic design is one of the most fun and enjoyable experiences I’ve ever had as a designer, and I’m happy it has become my main task day-to-day. Once you go big design, you don’t go back.

So get busy working on that large format design so “Yer Graphic’s Got Back!”

Becky would be happy.

Jacob Norris, FPPortable (Guest Post)
jacob@footprintexhibits.com

Jacob Norris is a project manager with Footprint Exhibits in Kent, WA. He has been designing graphics for over 24 years and has been working with large format for over 17 years. 

The 7 Truths about Renting a Trade Show Exhibit

January 20th, 2020 COMMENTS

Renting vs. Buying a Trade Show Exhibit

You’ve probably read articles about renting a trade show exhibit. Most are helpful, but others are just plain wrong. Frankly, that annoys me, but I understand why. Exhibit Rentals are growing rapidly. And exhibit companies are “positioning” themselves based on their rental strengths.

In our industry, there are one (1) person companies to (2500) person companies. Some build. Many do not. Some have large rental inventories. Others have little to none.

Not all rental inventories are equal. Some rely on aluminum extrusion vs. wood or modular walls vs. portable components. And how much of that inventory is new, ancient, or beat to hell? How does it assemble? Does it come with detailed setup instructions? What about design support?

The average exhibitor never asks these questions. It’s not because they don’t care, but because it would never occur to them.

Rental Inline Exhibit

The 7 Most Common Rental Misconceptions

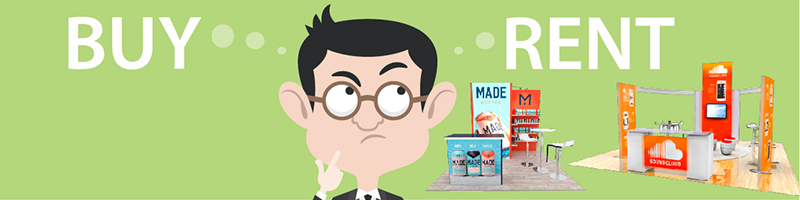
#1. Renting is An Option. Not THE ONLY Option

Rental ExhibitSome rental-only exhibit companies are touting renting as the only solution. They say, “Why buy when you can rent? No more storage fees. You can change the display for every show. The cost is less.”

It sounds attractive, and might make sense for many exhibitors. However, renting an exhibit, just like leasing a car, can be more expensive than purchasing. It depends on usage, lifespan, ongoing modifications, etc. It’s not as cut-and-dry as it appears at first glance. It’s important to run the numbers.

It’s not an either/or choice. Sometimes it makes sense to purchase a portion of the exhibit, say the main tower or overhead sign, and rent the components, like the counters, workstations, and charging stations. It depends on what you might want to change from show to show. But, again, you have to run the numbers and have a vision of your short- and long-term trade show marketing goals.

Finally, sometimes it’s not about the numbers. Some exhibitors want to own their display. Others do not. Cost has little to do with their decision.

Trade Show Island Exhibit Rentals#2. Rentals Can Be Customized, Which Isn’t the Same as Custom

Whenever someone tells you your rental exhibit is “custom,” you might want to dig deeper on what “custom” means. It might mean the design is custom, but the components come from stock inventory. Or there are several custom elements which are unique to your exhibit and are being depreciated over multiple rentals, either yours or other future rental clients. Or you are basically “purchasing” the custom element, but everyone is calling it a rental since you won’t own it.

While it’s true, you can technically get a custom exhibit as a rental, there are always strings attached such as a commitment to multiple rentals or a higher price for the one-time rental.

In most cases, a rental exhibit is a “customized” display using stock components, based on a preexisting or “customized” design, and client-specific graphics.

#3. You Rent the Structure, But You Own the Graphics

Remember you are renting the structure, but you own the graphics. Each time you change the messaging, you are buying new graphics. Be realistic about how often you plan to update your graphics. Clients often assume they will reuse the graphics 3-4 times, but marketing campaigns aren’t like a pair of jeans. They change. Sometimes every single show.

#4. Your Rental Components May Be Used for Another Client’s Rental

Recently, I read a blog post where the rental exhibit supplier said that your rental property would never be used for another rental. If that’s true, it’s either the smartest or the dumbest business model I’ve ever heard.

Now, in the real world, rental components are reused. That’s why rental exhibits can be less expensive. Duh?! Does that mean another exhibitor will have exactly the same design as you? Perhaps, but it’s very unlikely since every exhibit has unique needs and distinctive graphics. However, the modular aluminum wall used in Job ABC will get reused two months later on Job XYZ. And then again, until it’s no longer serviceable as a rental component. To pretend otherwise is disingenuous. 

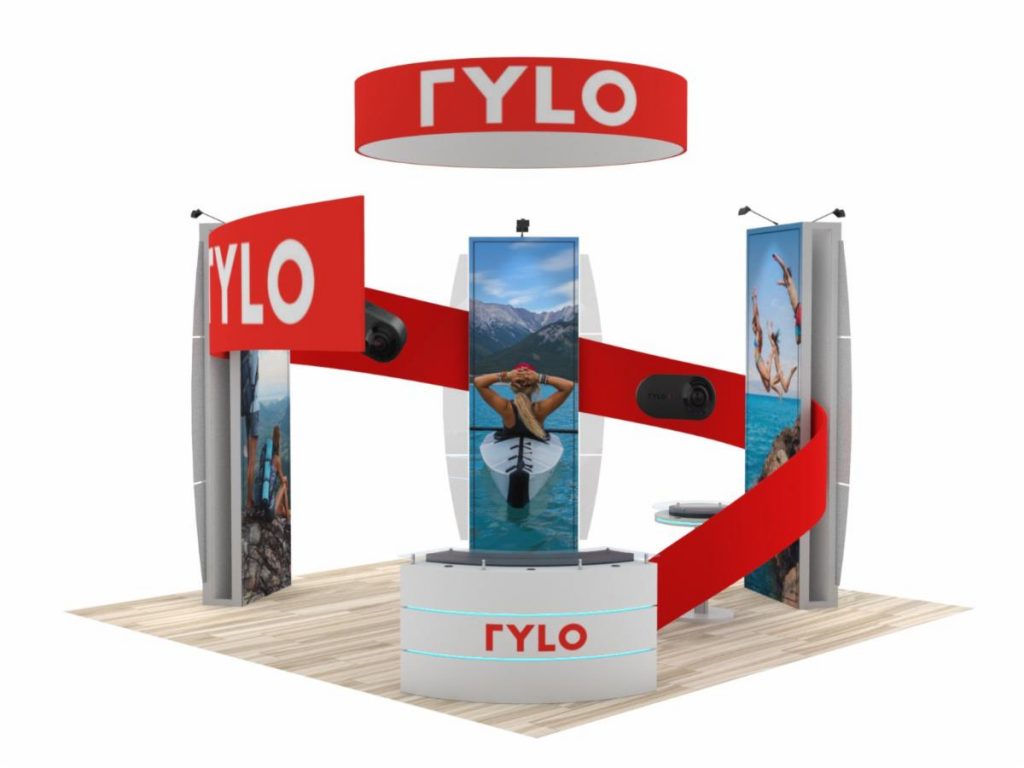
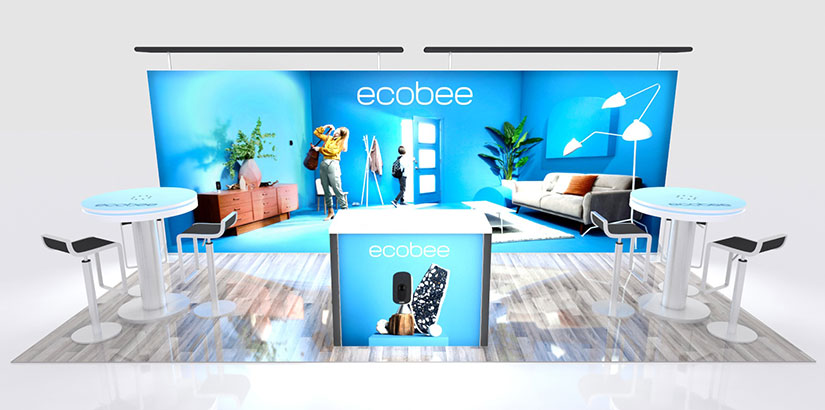
#5. Size Matters. Inventory Matters. Design Matters.

Do you remember when I said that there are companies ranging from one employee to several thousand employees? Those companies all have different rental capabilities, either in-house or through a strategic partner like Classic Exhibits. No one has an unlimited budget to stock every possible rental design.

Ask yourself this… Is the proposed design guided by their limited rental inventory or by your trade show design requirements? Whatever rental company you choose, they should treat the process as if you were purchasing a display, and the final display should look visually indistinguishable from a new exhibit.

#6. Packaging Matters. Instructions Matter. Quality Matters. 

Trade Show Inline Exhibit RentalsHere’s the very sad truth. No exhibitor ever asks about packaging, setup instructions, or quality, particularly on a rental property. And aside from design capabilities and inventory, nothing distinguishes an OK rental supplier from an AMAZING one than packaging, instructions, and quality. Too often, exhibitors save money by renting an exhibit only to piss it all away during setup and assembly on the show floor.

You should expect detailed drawings, numbered or labeled components, photos (showing where the supplier pre-assembled it at their facility), jigged packaging/crating, and clean hardware. The hardware should appear new or newish, not like it just fell off the truck, rolled around in the dirt, and then was tossed into a crate. When you open the crate, it should make you smile, not cringe in fear.

#7. Rentals are a Long-term Partnership with Your Exhibit Supplier

Depending on the rental schedule, you are going to see each other a lot. And, based on that ongoing relationship, you are going to flourish or falter. Exhibit rentals require a communication commitment. What’s your show schedule? Does the design need to change? Were there any issues at the last show? How about new graphics? Is your next show an inline vs. an island? When do you want to booth to ship and are there any services you need such as rental furniture, I&D, electrical, flooring, etc.

Rentals force both sides to communicate, often far in advance. It doesn’t take long to decide whether it’s a fit or whether it’s time for you to start seeing other people. But, when it does work, it’s a beautiful thing.

One final piece of advice — not all suppliers are equally good at both. Your current supplier may be a magician at designing a custom exhibit but lack the skills, interest, or inventory to pull the rental rabbit out of a hat. Being good at one is no guarantee of being good at the other. Ask the hard questions and be willing to work with someone else if anything seems amiss.

In the end, your rental experience should be no different from a purchase, whether during the exploratory and design process or at the show. Always expect the best.

Have questions? Give us a call or send us an email. We would love to chat with you.

–Mel White
mel@classicexhibits.com
http://www.linkedin.com/in/melmwhite

**********************************************

Classic Exhibits Inc. designs and manufacturers portable, modular, hybrid, custom, rental exhibit solutions. Classic Exhibits products are represented by an extensive distributor network in North America and in select International markets. For more information, contact us at 866-652-2100 or www.classicexhibits.com.

Up Your Game Newsletter | January 2020

January 20th, 2020 COMMENTS
January 2020 Up Your Game Newsletter from Classic Exhibits

EXHIBITORLIVE 2020 (Code #4044)

EXHIBITORLIVE 2020

If you are attending EXHIBITOR LIVE and want a FREE exhibit hall pass, go to this page and enter Classic’s code 4044 . There’s no limit on the number of free passes so share (and share) away.


To reserve your seat for the Women in Exhibition Breakfast on March 31, contact Katina Rigall Zipay .

Now & Then with Harold Mintz

Harold Mintz Blog Post

A lot has changed in the exhibit industry over the past ten years. And Harold Mintz, a Classic Regional Sales Manager, has a unique perspective on those changes.


As many know, Harold took a trade show hiatus for ten years. What was common “back in the day” isn’t quite as common today, such as dedicated territories, show rooms, and modular wall systems. 

Read Harold’s thoughts about “What’s Different” in 2020 in the Trade Show Tales blog. 

Eco-Systems Sustainable by Classic Exhibits

Eco-systems Sustainable Designs Press Release

We’ve all seen the phrase, “New Look, Same Great Taste!” whenever companies refresh their packaging.  Effective January 1, Eco-Systems Sustainable has joined the Classic Exhibits Family. Same ECO products, designs, and people, just with new Classic packaging.


All the ECO kits are in Exhibit Design Search, and you now have access to the full Classic Design Team. See the press release in EXHIBITOR along with quotes from Kevin Carty and Colleen Crawford.

Shared Knowledge University

Shared Knowledge University June 2020

There’s no substitute for hands-on training and one-on-one interaction with your industry colleagues. Just ask the over 600 Classic Distributors who have attended Shared Knowledge University in Portland.

This year, the two-day training will be on June 15-16 (Monday and Tuesday). SKU includes morning sessions with Classic and our Strategic Partners and afternoon sessions at the Classic facility where you work with products like Gravitee, SuperNova, InCharg Charging Solutions, and Symphony. Plus amazing meals and entertainment.


For more information and to reserve a seat, contact Jen LaBruzzaHarold Mintz, or Tom Beard. See the video below for SKU highlights.

Click Here for More Information & to Register

Our Annual State of the Company Letter

Classic Exhibits, Annual State of the Company Letter

In case you didn’t see Kevin’s 2019/2020 State of the Company letter, here’s a link to download a PDF version. Topics included the 2019 sales roller coaster, custom projects, new additions to the sales team, and changes to Classic’s Customer Service Department, including the addition of Eco-System Sustainable into the Classic Family.

And while 2019 was exciting, we expect 2020 to be even more eventful as we continue to expand our rental offerings, launch the Symphony Portable line, and work on even more interesting projects ( although building the Millennium Falcon may be hard to top ).

Shared Knowledge University Video

“I have a dream that my four little children will one day live in a nation where they will not be judged by the color of their skin but by the content of their character.” ― Martin Luther King Jr.

What to Look for in an LED Lightbox Manufacturer

January 15th, 2020 COMMENTS

Rental Exhibits
Stroll through any airport, mall, event, or trade show and you’ll see hundreds of colorful LED lightboxes in every shape and size. Over the past few years, most have switched to Backlit Tension Fabric SEG Graphics. The reasons are obvious. Not only is fabric more durable than direct print graphics, but it’s also cheaper to ship and easier to maintain. And depending on the print process, the colors are vibrant and the details nearly photographic. 

It’s easy to assume that all LED lightboxes and manufacturers are similar, and the only real difference is price. Price matters of course, but there are other factors to consider.

9 Factors to Consider When Purchasing an LED Lightbox 

#1. Hardness and Durability:  All LED Lightboxes start with an SEG aluminum frame. Every manufacturer engineers their frames using aluminum of varying hardness and durability. Less expensive lightboxes use softer aluminum because it’s cheaper. But cheaper aluminum scratches easily and tarnishes quickly. In addition, the wall thickness is often so thin that structural rigidity is compromised. For lightboxes mounted to a wall or assembled or disassembled at multiple trade shows, you will want aluminum with a 6063 specification. 6063 has better structural integrity and scratch resistant. If the supplier can’t answer that question, then you should be wary. 

#2. Availability: Does the manufacturer have the extrusion, LED lights, hardware, and accessories in stock? And are there extrusion options depending on the situation, such as one-sided vs two-sided, freestanding vs. wall mount. What if you need multiple quantities or quick ship options? Can individual parts be purchased if they are lost or damaged? You don’t want a manufacturer who dabbles in lightboxes. 

#3. Customization: Let’s say you need a width or height larger than the kits listed. Is it possible? If so, how complicated or expensive does it get? How about angles or shapes such as a hexagon? It’s easy to do squares and rectangles (for most manufacturers), but odd shapes and sizes are often a head-scratcher for those who only want to fulfill kits. 

#4. Print Quality: Asking the right questions is essential. 1. Dye-sublimation printing is the best. This ensures the colors are infused into fabric, not just printed on the surface. Many suppliers brag about “fabric printing” but it’s not always dye-sublimation, which requires two steps  — printing to a paper material and then heat fusing the image to fabric. 2. Ask about the age of the printer. The dye-sublimation printer shouldn’t be more than two years old. Anything older than that means the print resolution is just OK, not photographic. 3. Just like clothing, the fabric quality can vary, which may not matter if the graphic is a throwaway and the resolution doesn’t matter.    

#5. Sewing and Sizing:  Experienced manufacturers have this down to a science. They’ve done the calculations thousands of times with varying fabrics, and they know how to print, cut, and sew the fabric so it fits perfectly. Not too loose. Not too tight. Nothing is more frustrating than receiving a fabric graphic that doesn’t fit. 

#6. LED Lights:  This could be a college course. Just understand the various color temperatures, lens, UL and ETL certification, module construction, etc. requires some research and patience. Like fabric, there are multiple ways to make LED lights cheaper, if cheaper is the only criteria. Skipping UL/ETL certification is shortcut. Using exposed connections or alligator clips is another. Sadly, it’s nearly impossible to know what you are getting before you get the LED lightbox. However, in this case, the old adage rarely fails, “If it’s too good to be true, then it probably isn’t.” 

#7. Accessories: Most LED lightboxes are a one-trick pony. The are lightboxes.  That’s it. But what if you want to add shelves, an iPad, a literature holder, wings or headers? What if you want to connect it to other lightboxes or create a full inline or island display. That requires and exhibit builder who has engineered the extrusion to be multi-functional, stocks lightbox accessories, and has the in-house talent to customize. 

#8. Packaging: It’s easy to assume that your display will ship in high-quality cases and packaging. Sadly, that’s rarely true. Most manufacturers use disposable one-way shipping materials. Your lightbox arrives undamaged. Now you have to ship it to the next show or to another location, but there’s nothing to protect it or keep it organized. Insist on reusable shipping materials, which precludes cardboard, shrink wrap, and thin foam. All three will be destroyed after one use. See examples. While you may have to pay a little more, it’s an investment that keeps giving show after show, assembly after assembly.  

#9. Assembly:  It’s easy to overlook how the lightbox will be assembled but that would be a HUGE MISTAKE. Some require tools and a bag of loose parts. Others have push-button connectors. Others are “mostly” tool-less, but the hardware is cumbersome and/or unnecessarily complicated. Ask to see the instructions or an assembly video. Even if you aren’t planning to assemble it, could you put it together based on the instructions in a reasonable amount of time? Remember, time is money, especially on the show floor. No one wants surprises at a trade show, and a well-designed lightbox won’t make you sweat, literally or figuratively. Do the research and trust your gut.

It’s important to remember that the pretty image you see on a website is just a rendering. What you receive is not. Ask the right questions and purchase your lightbox from a vendor you trust. Remember, you “may” be able to return the hardware, but the graphics, it’s yours whether you like it or not. Finally, keep in mind that you are buying a design, a marketing structure that represents your brand. It’s more than just an aluminum frame with graphics. 

–Mel White
mel@classicexhibits.com
http://www.linkedin.com/in/melmwhite

**********************************************

Classic Exhibits Inc. designs and manufacturers portable, modular, hybrid, and custom exhibit solutions, including SuperNova LED Lightboxes. Classic Exhibits products are represented by an extensive distributor network in North America and in select International markets. For more information, contact us at 866-652-2100 or www.classicexhibits.com.


When to Purchase vs. Rent an Exhibit — Understanding Your Options

January 14th, 2020 COMMENTS
Trade Show Rental Exhibit
Inline Rental Exhibit

Why Rent Your Next Exhibit?

It’s an exciting time to be in the exhibition industry. At no other time in the past 20 years has the pace of change been so dramatic. While some exhibit houses are embracing it, others are sticking their proverbial head in the sand.

Take rental displays for example. Just a few years ago, rental displays were the stepchildren of trade show design. Neglected and underappreciated by both exhibit houses and general service contractors. Exhibitors who chose a rental display either weren’t serious about trade show marketing or simply didn’t understand the poor image those displays projected on the show floor.

How that has changed! Rentals have gone upscale and depending on the provider can be customized to meet almost any exhibitor’s marketing goals. They are basically indistinguishable from the purchase display across the aisle or your competitor’s new exhibit. So why the change and why should you consider a rental OR better yet a purchase/rental?

The Top 3 – Plus a Bonus Tip. 😉

Reason #1 – Design Flexibility

The marketing goals for most companies are constantly evolving with multiple campaigns and a host of products and services, each with a distinct brand and messaging. What worked in Q1 may not be effective for Q3 or scrapped all together.

Rental displays make it easy to change graphics, add structural elements, or simply go from an inline to an island (or vice versa). That flexibility can be very dynamic for your brand and marketing goals and more cost effective in the long-term.

Trade Show Rental Exhibit
Island Rental Exhibit

Reason #2 – Upfront Cost

Rental displays are not only less expensive upfront, but they also allow you to stretch your budget even further. Take the exhibitor who settled for a ho-hum inline in the past. With a rental, they could add attractive meeting space, LED lighting, large monitors, shelving, and extensive storage – all at the same price of a purchase.

More bang for the buck means you can elevate your trade show presence with attendees. Or, if you choose not to make significant changes to the display, the savings can be spent on client entertainment/meals, pre-show marketing, or booth staffing. Or directly to your marketing bottom line.

Reason #3 – Associated Expenses

When you purchase a new exhibit, there are always associated expenses, some you may not anticipate. Storage for example. Larger exhibits are packed in crates. Those crates either must be stored at your exhibit house for a monthly fee or in your own facility. Either way, it’s an ongoing cost. Plus, when components are lost or damaged, those must be replaced.

Before each show, someone has to reassemble the booth to ensure all the parts and pieces are there, and if there are changes, then there are design fees, new components or graphics, and the labor to get it prepped and perfect.

With a rental, nearly all of that disappears. No storage. No prep charges. No labor. You may have new charges if you change the graphics or the design, but in general, those are more controllable and predictable.  

Trade Show Rental Exhibits
Inline Trade Show Rental Exhibit

Bonus Tip – Rental and Purchase

Rental vs Purchase doesn’t have to be an either/or decision. More and more sophisticated exhibitors are choosing both. They purchase those design elements they know they’ll use again and again regardless of the show or configuration. For example, a central 12 ft. tower with locking storage. If you need that every single time, then it makes sense to buy it and rebrand it when necessary. However, if you sometimes need multiple monitor workstations but other times you would rather have more meeting space, then it doesn’t make sense to purchase monitor stands. Rent them instead.

It’s often the peripheral items like counters, pedestals, charging stations, monitor stands, lightboxes, etc. which change frequently. Rent them. That way you can play with what works best and make informed decisions based on your experience and success.

Still a Bit Confused?

Your next step is to work with an experienced exhibit professional like Brave Exhibits or other Classic Exhibits Distributors. Their sole mission is maximizing your trade show success. Show after show. Brave Exhibits has learned how to avoid the costly mistakes that inexperienced exhibitors make. And believe me, it’s easy to waste money before you know what works and what doesn’t. They’ll ensure that doesn’t happen whether you decide on a Purchase or Rental or Purchase/Rental.

To browse our extensive rental inline and island galleries, click on the links.